Etching | The what | The when | The how | And where

Printmaking

Rembrandt-Self Portrait

What is Etching ?

Etching is traditionally the process of using strong acid or mordant to cut into the unprotected parts of a metal surface to create a design in intaglio (incised) in the metal. In modern manufacturing, other chemicals may be used on other types of material. As a method of printmaking, it is, along with engraving, the most important technique for old master prints, and remains in wide use today. In a number of modern variants such as micro-fabrication etching and photo-chemical milling it is still crucial technique in much modern technology, including circuit boards.

When had it ever started ?

There is no historical evidence in who exactly discovered metal would be incised when dipped in acid.

But yes, chronologically speaking, the profession of etching , the Etchers , were goldsmiths. The earlier artworks of etching is vividly seen in the suits of kings and his knights.

How did Etching meet Printing ?

In 1497 , German Etcher Daniel Hopfer married Justina Grimm, sister of the Augsburg publisher, physician and druggist Sigismund Grimm.

During the year of early 15th century, when both printing and etching were at par together , Daniel blended both of the art . His advantage of the Augsburg Publisher and his skill as an etcher paved this way.

There were no existential works of Daniel Hopfer that couldn’t predate the works of Urs Graf , a Swiss Renaissance print-maker, who happens to has had done the earliest known etchings on paper. Graf learnt the skill from Hopfer, so it would be logical in whom did it start out with. But there aren’t clear evidence of Daniel Hopfer’s work to prove this .

The hows of Etching

In traditional pure etching, a metal (usually copper, zinc or steel) plate is covered with a waxy ground which is resistant to acid. The artist then scratches off the ground with a pointed etching needle. where he or she wants a line to appear in the finished piece, so exposing the bare metal.

Scratching over the acid resistant ground with sketch

The échoppe, a tool with a slanted oval section, is also used for “swelling” lines. 

An Echoppe

The plate is then dipped in a bath of acid, technically called the mordant (French for “biting”) or etchant, or has acid washed over it. The acid “bites” into the metal (it reacts with it in a Redox reaction) to a depth depending on time and acid strength, leaving behind the drawing skillfully carved into the wax on the plate.

Dipping the metal in acid bath

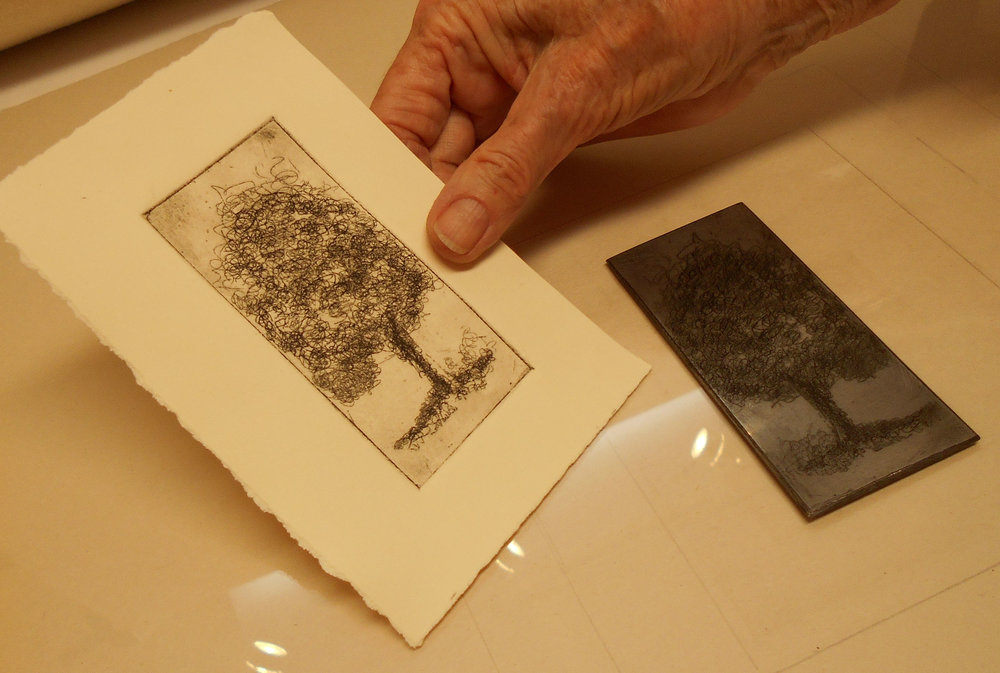
The remaining ground is then cleaned off the plate. For first and renewed uses the plate is inked in any chosen non-corrosive ink all over and the surface ink drained and wiped clean, leaving ink in the etched forms.

The plate is then put through a high-pressure printing press together with a sheet of paper (often moistened to soften it). The paper picks up the ink from the etched lines, making a print. The process can be repeated many times; typically several hundred impressions (copies) could be printed before the plate shows much sign of wear. The work on the plate can be added to or repaired by re-waxing and further etching; such an etching (plate) may have been used in more than one state.

The Print on the paper after pressing over it

At a glance with brief details

Summary of the final work

#1.The final printed ink work would be a mirror image of the sketch scratched over the plate .

#2.The longer the placement of the grounded metal plate inside the acid bath, the deeper the incision could get. Alternate application of ground after acid bath can lead to tone differences.

#3.The formation of bubbles during the biting period could hinder the process. A soft brush can be used to eliminate them or by inverting the metal plate would help (taking it out could slightly be difficult though).

#4.Remove the acid left over the plate with water and apply solvent such as turpentine to remove the wax ground. Eliminate the grease of the solvent using Mentholated spirit. The grease could affect the ink while spreading over it .

#5. Apply the ink evenly into the grooves of the plate using a matte card. the main idea is to get them grooves filled with ink.

#6. Wipe off the ink on the surface of the metal plate only using organza paper or common new papers will do.

#7. Inverse the metal plate over a moist paper and press it uniformly .

The Acids

Use Ferric Chloride for Copper and Zinc Plates : 1 Part Ferric Chloride and 1 part water

Use Nitric Acid for Steel and Zinc Plates : 1 Part Nitric Acid and 1 Part water

Different types of metal plates

Steel

Durable . Has natural and rich aquatints . Line quality not as fine as copper.

Mr.Smiths Illustration and Prints

Copper

Traditional metal . Bites evenly . Holds Texture well. Does not distorts the ink when wiped

Beats-Rosie McLay

Zinc

Easy to deal with . Cheaper. Does not bites cleanly . Alters some color of ink.

Zemaysprinting-Copper sulphat mordant

The difference of the inked work from Xylography and Etching

Xylography

The medium is processed upon a wooden block(profoundly Birch wood ). It is a mechanical process gouges along the lines of wood grains. It consumes lot of time. The grooves are uniform in nature. Only the surface of the wood is meant to get inked. The natural texture of the wood gets printed with the ink.

Example of Xylography print

Etching

The medium to be processed upon is a metal . it could be Iron , Copper or Zinc. It is a chemical process involving the after effects of an acid on a metal plate when it is dipped into it. It takes lesser time . The incision/grooves need not be uniform in nature. The grooves are meant to be inked . The natural texture of the metal becomes a background of the print.

Etching on Steel plate

NON TOXIC ETCHING

In the late 20th century, Floor wax has been used as hard ground cover for coating plates. Mark Zaffron and Keith Howard developed acrylic polymers as ground and ferric chloride for etching. The polymers could be removed using sodium carbonate -washing soda , rather than solvents . Ferric chloride does not produce corrosive gas in the process.

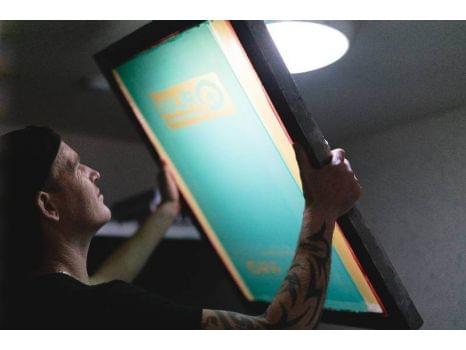
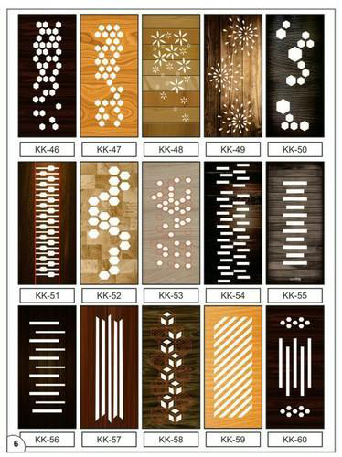
The where of Etching presently

During the 17th century, the final works of both xylography prints and etching print turned out to be formidably similar . And technology took in to make better printing techniques. Now-a-days , Etching is done predominantly in micro-fabrication industries and in name boards. Micro-fabrication took the concept of etching to a whole new level by the commencement of photo-chemical machining . Thus the art has not lost its value . It has only been used effectively now .

Good things take time .

Take a look at how its done !

https://en.wikipedia.org/wiki/Etching

https://science.jrank.org/pages/2516/Engraving-Etching-Evolution-etching-techniques.html

https://en.wikipedia.org/wiki/Daniel_Hopfer

XYLOGRAPHY

Printmaking, Uncategorized

THE ART OF ENGRAVING ON WOOD OR OF PRINTING FROM WOOD BLOCKS

Woodcut is a relief technique in printmaking . An artist carves an image into the surface of a block of wood typically with gouges—leaving the printing parts level with the surface while removing the non-printing parts. Areas that the artist cuts away carry no ink, while characters or images at surface level carry the ink to produce the print. The block is cut along the woodgrains (unlike woodengraving , where the block is cut in the end-grain). The surface is covered with ink by rolling over the surface with an ink-covered roller (brayer), leaving ink upon the flat surface but not in the non-printing areas.

Image result for xylography

Xylography didn’t appear in print in English until 1816, but it is linked to printing practices that are much older. In fact, the oldest known printed works (from Japan and China in the 8th and 9th centuries) were made by , a printing technique that involves carving text in relief upon a wooden block, which is then inked and applied to paper. This method of wood-block printing appeared in Europe in the 14th century, and eventually inspired Johannes Gutenberg to create individual and reusable pieces of type out of metal. These days, xylography can also describe the technique of engraving wood for purely artistic purposes. English speakers picked up the word from French, where it was formed as a combination of xyl-, meaning “wood,” and -graphie, which denotes writing in a specified manner

WHITE LINE WOODCUT

This technique just carves the image in mostly thin lines, similar to a rather crude engraving. The block is printed in the normal way, so that most of the print is black with the image created by white lines. This process was invented by the sixteenth-century swiss artist Urs Graf, but became most popular in the nineteenth and twentieth century, often in a modified form where images used large areas of white-line contrasted with areas in the normal black-line style.

Image result for white line woodcut technique
  • COLOUR
  • Sumizuri-e ( “ink printed pictures”) – monochrome printing using only black ink
  • Benizuri-e ( “crimson printed pictures”) – red ink details or highlights added by hand after the printing process;green was sometimes used as well
  • Tan-e – orange highlights using a red pigment called tan
  • Aizuri-e ( “indigo printed pictures”), Murasaki-e (紫絵, “purple pictures”), and other styles that used a single color in addition to, or instead of, black ink
  • Urushi-e – a method that used glue to thicken the ink, emboldening the image; gold, mica and other substances were often used to enhance the image further. Urushi-e can also refer to paintings using lacquer instead of paint; lacquer was very rarely if ever used on prints.
  • Nishiki-e ( “brocade pictures”) – a method that used multiple blocks for separate portions of the image, so a number of colors could achieve incredibly complex and detailed images; a separate block was carved to apply only to the portion of the image designated for a single color. Registration marks called kentō (見当) ensured correspondence between the application of each block.

CHAIROSCURO WOODCUTS

Chiaroscuro woodcuts are old master prints in woodcut using two or more blocks printed in different colours; they do not necessarily feature strong contrasts of light and dark. They were first produced to achieve similar effects to chiaroscuro drawings.

woodcut technique in mexico

Today, in Mexico the activist woodcut tradition is still alive. In Oaxaca, a collective called the Asamblea De Artistas Revolucionarios De Oaxaca (ASARO) was formed during the 2006 Oaxaca protests. They are committed to social change through woodcut art.[23] Their prints are made into wheat-paste posters which are secretly put up around the city.[24] Artermio Rodriguez is another artist who lives in Tacambaro, Michoacán who makes politically charged woodcut prints about contemporary issues.

PRINTMAKING – Mezzotint and Aquatint

Printmaking

MEZZOTINT

Saint Agnes, Mezzotint by John Smith after Godfrey kneller, usually thought to be a portrait of his daughter, Catherine voss, by his mistress.

•A technique to create values; does not depend on line.
•Mezzotint comes from the Italian word meaning “half tint”.
•Rarely used today, painstaking and time consuming.
•The only intaglio technique that proceeds from dark to light rather than the opposite. The metal plate is totally abraded with an instrument called a rocker.
Rocker is a tool shaped a bit like a spatula, but the business end is curved and covered with a row of small teeth.
•Were it inked and printed at this point, it would produce an even, rich black. The design, in areas of tone rather than lines, is produced entirely by smoothing areas of the plate with a scraper or a burnishing tool. The more scraping and burnishing done, the lighter the area.

•The first step in creating a Mezzotint is to cover the entire plate with a texture which will hold the ink. This process is called grounding.
•Once the plate is textured, the fun can begin, creating an image on the plate.
At this stage, a pencil line drawing is made on the textured plate, or traced from a drawing made on a piece of paper.
•Then, the artist uses a number of tools to scrape and burnish, or polish, the copper plate in the areas that need to be grey or white.
•This is the part of the process where the artist is actually making art – Think of it as drawing the picture, but instead of paper and pencil, the art is made with copper and scrapers
•The ink is rolled onto the plate.

•Unlike the ink in your ball-point pen, this stuff is amazingly gooey. It has the thickness of bathtub caulk, the stickiness of clover honey, and the color of the inside of a deep, deep cave.

•Once the ink is on the plate, and rubbed into all of the pits and burrs, it’s time to wipe the excess away from the surface. This will allow all of those scraped and burnished sections to print in Grey’s and whites. All the parts of the plate that still have the rocked texture will print in rich, velvety blacks.
•The press must put a very large amount of pressure on the plate in order to press the ink out of all those nooks, crannies and burrs and out onto the paper.

AQUATINT

Philibert-louis debucourt, the public promenade, 1792. Printed in colour from various plates, using etching, engraving, and aquatint. One of the leading achievements of the French 18th century colour print.

•Technique to create values.
•Much easier and quicker than Mezzotint.
•It is a method of etching tonal areas into a metal plate.
•Name derives from the Latin aquafortis, indicating nitric acid (literally, “strong water”), and the Italian tinto, meaning tone.
•Often used in conjunction with linear etching or engraving.
•The texture of aquatint plate can be coarse of very fine.
•It’s effect is to produce solid areas of tone.
•It is a special form of etching.
•It is created by etching sections rather than lines of a plate.
•First a porous ground of powdered or melted resin or asphalt or a similar ground is dusted onto the plate.

Mary Cassatt, woman bathing, drypoint and aquatint, from three plates, 1890-91

•Next the plate is heated from below and as a result the applied dusty coat adheres to the metal and is acid-resistant. The acid is spread over the plate and bites into the tiny holes left in the coating.
•This technique is used to create tone and texture in a print. The plate is sprinkled with a powdered resin, heated so the resin melts and clings, then given an acid bath to bit the areas not covered by the resin, creating a porous ground.
•A technique of acid-biting areas of tone rather than lines. A ground is used that is not completely impervious to acid, and a pebbly or granular texture ( broad or fine) is produced on the metal plate. Stop-out, second and third bites are. Used to produce variations of darkness

Claes Oldenburg floating three-way plug 1976

WHAT IS SCREEN PRINTING?

Printmaking

Screen printing is the process of pressing ink through a stencilled mesh screen to create a printed design. It’s a popular technique used in a whole range of different industries, so even if you’ve never heard of the term before today, it’s likely that you’ve worn or used a screen-printed product at some point without even realising. The process is sometimes called serigraphy or silk screen printing, but all of these names refer to the same basic method.

Screen printing is an effective technique for creating bold canvases, posters and artwork, but the method can also be used to print fabrics and textiles, so it’s great for creating all sorts of custom clothing and products. In this guide, we’ll cover all of your questions about silk screen printing, including.

screen printing process step by step

There are different methods of screen printing, but they all involve the same basic technique. The form of printing we’ll talk about below uses a special light-reactive emulsion to create a custom stencil; this tends to be the most popular type of commercial printing, as it can be used to make intricate stencils.

Here, we’ll talk you through the screen printing process step by step. We’ve also put together a video of the process taking place in our workshop, so you can see how we create our top-quality custom screen-printed clothing.

STEP 1: THE DESIGN IS CREATED

To start, the printer takes the design they want to create on the finished product, and prints it out onto a transparent acetate film. This will be used to create the stencil.

Step 2: The screen is prepared

Next, the printer will choose a mesh screen to suit the complexity of the design, and the texture of the fabric being printed. The mesh screen is then coated with a layer of light-reactive emulsion, which will harden when developed under bright light.

Step 3: The emulsion is exposed

The acetate sheet featuring the design is then laid onto the emulsion-coated screen, and the whole thing is exposed to a very bright light. The light hardens the emulsion, so the parts of the screen which are covered by the design remain in liquid form.

If the final design is going to include more than one colour, then a separate screen must be used to apply each layer of ink. To create multi-coloured products, the printer must use his skill to design each stencil, and line them up perfectly to ensure the final design is seamless.

Step 4: The emulsion is washed off, creating the stencil

After the screen has been exposed for a set time, the areas of the screen not covered by the design will have turned hard. Any unhardened emulsion is then carefully rinsed away. This leaves a clear imprint of the design on the screen for the ink to pass through.

The screen is then dried, and the printer will make any necessary touch-ups or corrections to make the imprint as accurate as possible to the original design. The stencil is now ready to be used.

STEP 5: THE ITEM IS PREPARED FOR PRINT

The screen is then placed on the printing press. The item or garment being printed is laid down flat onto the printing board, underneath the screen.

There are a number of different presses, including manual and automatic styles, but most modern commercial printers will use an automatic rotary carousel printer, as this allows several different screens to work at once. For multicoloured prints, this sort of printer can also be used to apply the separate colour layers in quick succession.

Step 6: The ink is pressed through the screen onto the item

The screen is lowered down onto the printing board. Ink is added to the top end of the screen, and a squeegee is used to pull the ink along the full length of the screen. This presses the ink through the open areas of the stencil, imprinting the design on the product underneath.

If the printer is creating multiple items, then the screen is raised and a new garment is placed onto the printing board. The process is then repeated.

Once all the items have been printed and the stencil has served its purpose, the emulsion is removed using a special washing fluid so the mesh can be reused to create new stencils.

Step 7: The product is dried, checked and finished

The printed product then passes through a dryer, which ‘cures’ the ink and creates a smooth, colourfast finish. The final product will be checked and washed thoroughly to remove any residue, before being passed on to its new owner.

A guide to screen printing equipment

Screen Printing Diagram

To get a clean, sharp print, a screen printer needs to have the right tools for the job. Here, we’ll talk about every piece of screen printing equipment, including what function they serve during the printing process.

SCREEN PRINTING PRESS

While it is possible to screen print with just a mesh screen and a squeegee, most printers prefer to use a press, as it allows them to print lots of items more efficiently. This is because the press holds the screen in place between prints, making it easier for the user to swap out the paper or clothing being printed.

There are three types of press: manual, semi-automatic, and automatic. Manual presses are operated by hand, meaning they’re quite labour intensive. Semi-automatic presses are partially mechanised, but still require human input to swap over the items being pressed, while automatic presses are completely automated and require little to no input.

Businesses that need to print items in large quantities will normally use a semi- or fully automatic press, as this allows faster, more efficient printing and minimises mistakes. Smaller companies, or those who do screen printing as a hobby, might find that a manual table-top press (sometimes called a ‘handbench’ press) is better suited to their needs.

The inks

The ink, pigment or paint is pushed through the mesh screen and onto the item being printed, transferring a coloured imprint of the stencil design onto the product.

There’s much more to choosing an ink than just picking a colour. There are lots of specialist inks, which can be used to create different effects on the finished product. For instance, a printer may use glittery inks, texturised inks, or puff inks (which expand to create a raised surface) to create a unique look or feel. The printer will also take into account the type of fabric being screen printed, as some inks will work better on certain materials than others.

When printing clothing, printers will use a type of ink which becomes machine washable once it has been heat-treated and set. This produces a colourfast, long-wearing item that can be worn again and again.

https://www.customplanet.co.uk/what-is-screen-printing

LASER PRINTING

Printmaking

Laser printing is an electrostatic digital printing process. It produces high-quality text and graphics (and moderate-quality photographs) by repeatedly passing a laser beam back and forth over a negatively charged cylinder called a “drum” to define a differentially charged image.The drum then selectively collects electrically charged powdered ink (toner), and transfers the image to paper, which is then heated in order to permanently fuse the text, imagery, or both, to the paper. As with digital photocopiers, laser printers employ a xerographic printing process. Laser printing differs from traditional xerography as implemented in analog photocopiers in that in the latter, the image is formed by reflecting light off an existing document onto the exposed drum.

PRINTING PROCESS

A laser beam (typically, an aluminium gallium arsenide (AlGaAs) semiconductor laser) projects an image of the page to be printed onto an electrically charged, selenium-coated, rotating, cylindrical drum(or, more commonly in subsequent versions, a drum called an organic photoconductor made of N-vinylcarbazole, an organic monomer). Photoconductivity allows the charged electrons to fall away from the areas exposed to light. Powdered ink (toner) particles are then electrostatically attracted to the charged areas of the drum that have not been laser-beamed. The drum then transfers the image onto paper (which is passed through the machine) by direct contact. Finally the paper is passed onto a finisher, which uses heat to instantly fuse the toner that represents the image onto the paper.

There are typically seven steps involved in the process:

Raster image processing

The document to be printed is encoded in a page description language such as PostScript, Printer Command Language (PCL), or Open XML Paper Specification (OpenXPS). The raster image processor (RIP) converts the page description into a bitmap which is stored in the printer’s raster memory. Each horizontal strip of dots across the page is known as a raster line or scan line.

Charging

Applying a negative charge to the photosensitive drum

In older printers, a corona wire positioned parallel to the drum or, in more recent printers, a primary charge roller, projects an electrostatic charge onto the photoreceptor (otherwise named the photo conductor unit), a revolving photosensitive drum or belt, which is capable of holding an electrostatic charge on its surface while it is in the dark.

Exposing

Laser light selectively neutralizes the negative charge on the photoreceptive drum, to form an electrostatic imageLaser unit from a Dell P1500. The white hexagon is the rotating scanner mirror.

A laser printer uses a laser because lasers are able to form highly focused, precise, and intense beams of light, especially over the short distances inside of a printer. The laser is aimed at a rotating polygonal mirror which directs the light beam through a system of lenses and mirrors onto the photoreceptor drum, writing pixels at rates up to sixty five million times per second. The drum continues to rotate during the sweep, and the angle of sweep is canted very slightly to compensate for this motion. The stream of rasterized data held in the printer’s memory rapidly turns the laser on and off as it sweeps.

Developing

As the drums rotate, toner is continuously applied in a 15-micron-thick layer to the developer roll. The surface of the photoreceptor with the latent image is exposed to the toner-covered developer roll.

Transferring

A sheet of paper is then rolled under the photoreceptor drum, which has been coated with a pattern of toner particles in the exact places where the laser struck it moments before. The toner particles have a very weak attraction to both the drum and the paper, but the bond to the drum is weaker and the particles transfer once again, this time from the drum’s surface to the paper’s surface. Some machines also use a positively charged “transfer roller” on the back side of the paper to help pull the negatively charged toner from the photoreceptor drum to the paper.

Fusing

Toner is fused onto paper with heat and pressure

The paper passes through rollers in the fuser assembly, where temperatures up to 427 °C (801 °F) and pressure are used to permanently bond the toner to the paper. One roller is usually a hollow tube (heat roller) and the other is a rubber backed roller (pressure roller). A radiant heat lamp is suspended in the centre of the hollow tube, and its infrared energy uniformly heats the roller from the inside. For proper bonding of the toner, the fuser roller must be uniformly hot.

Some printers use a very thin flexible metal foil roller, so there is less thermal mass to be heated and the fuser can more quickly reach operating temperature. If paper moves through the fuser more slowly, there is more roller contact time for the toner to melt, and the fuser can operate at a lower temperature. Smaller, inexpensive laser printers typically print slowly, due to this energy-saving design, compared to large high speed printers where paper moves more rapidly through a high-temperature fuser with a very short contact time.

Continuous printing

Once the raster image generation is complete, all steps of the printing process can occur one after the other in rapid succession. This permits the use of a very small and compact unit, where the photoreceptor is charged, rotates a few degrees and is scanned, rotates a few more degrees and is developed, and so forth. The entire process can be completed before the drum completes one revolution.

Color laser printers

Color laser printers use colored toner (dry ink), typically cyanmagentayellow, and black (CMYK). While monochrome printers only use one laser scanner assembly, color printers often have two or more.

https://en.wikipedia.org/wiki/Category:Laser_printers

WHAT IS SCREEN PRINTING?

Printmaking

Screen printing is the process of pressing ink through a stencilled mesh screen to create a printed design. It’s a popular technique used in a whole range of different industries, so even if you’ve never heard of the term before today, it’s likely that you’ve worn or used a screen-printed product at some point without even realising. The process is sometimes called serigraphy or silk screen printing, but all of these names refer to the same basic method.

Screen printing is an effective technique for creating bold canvases, posters and artwork, but the method can also be used to print fabrics and textiles, so it’s great for creating all sorts of custom clothing and products. In this guide, we’ll cover all of your questions about silk screen printing, including.

Why is screen printing used?

One of the reasons that the screen printing technique is so widely used is because it produces vivid colours, even on darker fabrics. The ink or paint also lies in layers on the surface of the fabric or paper, which gives the print a pleasingly tactile quality.

The technique is also favoured because it allows the printer to easily reproduce a design multiple times. Because the same stencil can be used to replicate a design again and again, it’s very useful for creating multiple copies of the same garment or accessory. This makes screen printing a very efficient technique for creating large batches of custom clothing for sports teams or work uniforms.

When carried out using professional equipment by an experienced printer, it’s also possible to create intricate multicoloured designs. While the complexity of the process does mean there’s a limit to the number of colours the printer can use, it does allow for more intense colouring than is possible to achieve with digital printing alone.

The screen printing process step by step

There are different methods of screen printing, but they all involve the same basic technique. The form of printing we’ll talk about below uses a special light-reactive emulsion to create a custom stencil; this tends to be the most popular type of commercial printing, as it can be used to make intricate stencils.

Here, we’ll talk you through the screen printing process step by step. We’ve also put together a video of the process taking place in our workshop, so you can see how we create our top-quality custom screen-printed clothing.

SCREEN PRINTING

STEP 1: THE DESIGN IS CREATED

To start, the printer takes the design they want to create on the finished product, and prints it out onto a transparent acetate film. This will be used to create the stencil.

Step 2: The screen is prepared

Next, the printer will choose a mesh screen to suit the complexity of the design, and the texture of the fabric being printed. The mesh screen is then coated with a layer of light-reactive emulsion, which will harden when developed under bright light.

Step 3: The emulsion is exposed

The acetate sheet featuring the design is then laid onto the emulsion-coated screen, and the whole thing is exposed to a very bright light. The light hardens the emulsion, so the parts of the screen which are covered by the design remain in liquid form.

If the final design is going to include more than one colour, then a separate screen must be used to apply each layer of ink. To create multi-coloured products, the printer must use his skill to design each stencil, and line them up perfectly to ensure the final design is seamless.

Step 4: The emulsion is washed off, creating the stencil

After the screen has been exposed for a set time, the areas of the screen not covered by the design will have turned hard. Any unhardened emulsion is then carefully rinsed away. This leaves a clear imprint of the design on the screen for the ink to pass through.

The screen is then dried, and the printer will make any necessary touch-ups or corrections to make the imprint as accurate as possible to the original design. The stencil is now ready to be used.

STEP 5: THE ITEM IS PREPARED FOR PRINT

The screen is then placed on the printing press. The item or garment being printed is laid down flat onto the printing board, underneath the screen.

There are a number of different presses, including manual and automatic styles, but most modern commercial printers will use an automatic rotary carousel printer, as this allows several different screens to work at once. For multicoloured prints, this sort of printer can also be used to apply the separate colour layers in quick succession.

Step 6: The ink is pressed through the screen onto the item

The screen is lowered down onto the printing board. Ink is added to the top end of the screen, and a squeegee is used to pull the ink along the full length of the screen. This presses the ink through the open areas of the stencil, imprinting the design on the product underneath.

If the printer is creating multiple items, then the screen is raised and a new garment is placed onto the printing board. The process is then repeated.

Once all the items have been printed and the stencil has served its purpose, the emulsion is removed using a special washing fluid so the mesh can be reused to create new stencils.

Step 7: The product is dried, checked and finished

The printed product then passes through a dryer, which ‘cures’ the ink and creates a smooth, colourfast finish. The final product will be checked and washed thoroughly to remove any residue, before being passed on to its new owner.

A guide to screen printing equipment

Screen Printing Diagram

To get a clean, sharp print, a screen printer needs to have the right tools for the job. Here, we’ll talk about every piece of screen printing equipment, including what function they serve during the printing process.

SCREEN PRINTING PRESS

While it is possible to screen print with just a mesh screen and a squeegee, most printers prefer to use a press, as it allows them to print lots of items more efficiently. This is because the press holds the screen in place between prints, making it easier for the user to swap out the paper or clothing being printed.

There are three types of press: manual, semi-automatic, and automatic. Manual presses are operated by hand, meaning they’re quite labour intensive. Semi-automatic presses are partially mechanised, but still require human input to swap over the items being pressed, while automatic presses are completely automated and require little to no input.

Businesses that need to print items in large quantities will normally use a semi- or fully automatic press, as this allows faster, more efficient printing and minimises mistakes. Smaller companies, or those who do screen printing as a hobby, might find that a manual table-top press (sometimes called a ‘handbench’ press) is better suited to their needs.

The inks

The ink, pigment or paint is pushed through the mesh screen and onto the item being printed, transferring a coloured imprint of the stencil design onto the product.

There’s much more to choosing an ink than just picking a colour. There are lots of specialist inks, which can be used to create different effects on the finished product. For instance, a printer may use glittery inks, texturised inks, or puff inks (which expand to create a raised surface) to create a unique look or feel. The printer will also take into account the type of fabric being screen printed, as some inks will work better on certain materials than others.

When printing clothing, printers will use a type of ink which becomes machine washable once it has been heat-treated and set. This produces a colourfast, long-wearing item that can be worn again and again.

https://www.customplanet.co.uk

CNC CUTTING

Printmaking

CNC means Computer Numerical Control. This means a computer converts the design produced by Computer Aided Design software (CAD), into numbers. The numbers can be considered to be the coordinates of a graph and they control the movement of the cutter.

VARIOUS TYPES OF CNC MACHINES Router
Plasma
Water jet
Pick and Place Oxy-Fuel

A CNC router can cut and engrave wood, metal, or plastic and is a very common type of CNC machine. The user does not manipulate the router, only enters information into the computer. If you were to order a cut sign made of these materials, chances are that a router was used to make it.
CNC plasma cutters are used to cut metal and wood (2 dimensional) and do not require as much power as a CNC router. These machines use a plasma torch to penetrate wood or sheet metal.
CNC laser cutters operate quite like CNC plasma cutters, but instead, a laser is used to cut the wood or metal. Lasers can also be used to cut plastic.
Pick and Place CNC Machines consist of several nozzles that pick up electrical components for electronic equipment and place them in the desired location. These are very commonly used in the construction of cell phones, computers, tablets, etc. Waterjet cutters work with a highly pressurized jet of water, or a mixture of water and abrasive. Waterjet cutting machines can cut wood to steel Oxyfuel cutters are used to cut through mild steel, stainless steel as well as aluminium. They are also capable of cutting metal plates and pipes.

A computer numerical control (CNC) router is a computer-controlled cutting machine related to the hand-held router used for cutting various hard materials, such as wood, composites, aluminium, steel, plastics, glass, and foams. CNC routers can perform the tasks of many carpentry shop machines such as the panel saw, the spindle moulder, and the boring machine. They can also cut mortises and tenons.

Applications A CNC router typically produces consistent and high-quality work and improves factory productivity. the CNC router can produce a one-off as effectively as repeated identical production. Automation and precision are the key benefits of CNC router tables.
A CNC router can reduce waste, the frequency of errors, and the time the finished product takes to get to market.A CNC router can be used in the production of many different items, such as door carvings, interior and exterior decorations, wood panels, sign boards, wooden frames, moldings, musical instruments, furniture, and so on. In addition, the CNC router helps in the thermoforming of plastics by automating the trimming process. CNC routers can help ensure part repeatability and sufficient factory output.

Parts of CNC Routers CNC routers have a few specific parts: a dedicated CNC controller, one or more spindle motors, servo motors or stepper motors, servo amplifiers, AC inverter frequency drives, linear guides, ball screws and a workspace bed or table.
In addition, CNC routers may have vacuum pumps, with grid table tops or t-slot hold down fixtures to hold the parts in place for cutting

CNC ROUTER
SOME PATTERNS DONE USING CNC CUTTING ON WOOD .

L I T H O G R A P H Y

Printmaking

Lithography  was invented in 1796 by German author and actor Alois Senefelder as a cheap method of publishing theatrical works.Lithography can be used to print text or artwork onto paper or other suitable material.

Lithography originally used an image drawn with oil, fat, or wax onto the surface of a smooth, level lithographic limestone plate. The stone was treated with a mixture of acid and gum arabic, etching the portions of the stone that were not protected by the grease-based image. When the stone was subsequently moistened, these etched areas retained water; an oil-based ink could then be applied and would be repelled by the water, sticking only to the original drawing. The ink would finally be transferred to a blank paper sheet, producing a printed page. This traditional technique is still used in some fine art printmaking applications.

In modern lithography, the image is made of a polymer coating applied to a flexible plastic or metal plate. The image can be printed directly from the plate (the orientation of the image is reversed), or it can be offset, by transferring the image onto a flexible sheet (rubber) for printing and publication.

As a printing technology, lithography is different from intaglio printing (gravure), wherein a plate is either engraved, etched, or stippled to score cavities to contain the printing ink; and woodblock printing or letterpress printing, wherein ink is applied to the raised surfaces of letters or images. Today, most types of high-volume books and magazines, especially when illustrated in colour, are printed with offset lithography, which has become the most common form of printing technology since the 1960s.

The related term “photolithography” refers to the use of photographic images in lithographic printing, whether these images are printed directly from a stone or from a metal plate, as in offset printing. “Photolithography” is used synonymously with “offset printing”. The technique as well as the term were introduced in Europe in the 1850s.

INKJET PRINTING

Printmaking

Inkjet printing is a type of computer printing that recreates a digital image by propelling droplets of ink onto paper and plastic substrates. Inkjet printers are the most commonly used type of printer, and range from small inexpensive consumer models to expensive professional machines.

Image result for INKJET PRINTING
PARTS OF AN INKJET PRINTER

WORKING

In a traditional thermal inkjet printer, ink is fed in to thousands of tiny reservoirs in the printhead from the cartridge, then heated rapidly by a tiny resistor, which causes the ink to form a bubble. This bubble then propels the miniscule droplets through a nozzle on to the page, where each forms an equally miniscule dot. These dots form the lines, characters and subtle gradations of colour that we see in a finished printout, whether that’s a simple letter, a 20-page report packed with charts and graphs or a family photo.


OFFSET PRINTING

Printmaking

Offset printing is a printing technique that involves the transferring of an image from a metal plate to a rubber blanket or rollers before being printed on the receiving media, usually paper. In this method, the paper does not come in direct contact with the metal plates. Offset printing is also known as offset lithography.

HISTORY OF OFFSET PRINTING

HISTORY OF OFFSET PRINTING
In the end of 19th Century , photography became popular, many
lithographic firms went out of bu...
The Harris Automatic Press company also created a similar press around
the same time.
By 1907 the Rubel offset press was i...

MECHANISM

-Offset printing helps in producing high-quality output on surfaces like cloth or wood. The rubber leaves a very fine print on rough surfaces, making the process effective. The process is equally efficient for small, medium and large-scale production of printing due to its high quality, inexpensiveness and consistent results.

The Roller Sequence of an Offset Press

-The first roller has a thin aluminum or plastic printing plate formed around it. This roller is called the Plate cylinder. The plates are custom made for each print job and contains the images that are to be transferred to the paper. The plates are treated so that certain areas attract ink while other areas attract a water solution which repels ink.

-As the plate cylinder spins, it contacts rollers that distribute a water solution onto the plate and other rollers that distribute ink onto the plate. Because the plate has been specially treated, the ink adheres to the image areas while the water solution repels ink from the non-image areas.

-The next roller in the sequence has a rubber blanket around it. This roller is called the Offset or Blanket cylinder and turns in the opposite direction of the plate cylinder. As the plate cylinder rolls against the offset cylinder, the water on the plate is squeezed away and the ink on the plate is transferred to the rubber blanket. The offset cylinder receives a mirror image of the ink design to be printed.

-The final roller in the sequence is called the Impression cylinder. It turns in the opposite direction of the offset cylinder. It is a clean steel cylinder that presses the paper against the rubber blanket to transfer the ink to the paper. The image on the paper is now identical to the image on the plate.

Image result for offset printing diagram

Each Ink Color has its own Set of Rollers

It is important to note that each ink color applied to the paper has its own set of rollers as described above. Hence, an offset press used for four color process printing has four sets of rollers in succession, one for each of the four CMYK colors. Likewise, a two color offset press will have two roller sets in succession.

Image result for CYMK PRINTING IN OFSET PRINTING

CLASSIFICATIONS

The publication industry uses two main kinds of printing techniques for bulk printing.

Sheet-Fed Offset Printing Method-In this method each sheet is fed into the machine individually, and they are cut before the printing process.

-These presses are the most cost-effective, particularly for large runs. It’s also ideal when you need large quantities and/or flexible color, paper and sizing options.

-Sheet fed offset printing is capable of producing high-quality printed products on a range of light and heavy-weight stocks.

Image result for offset printing diagram
Image result for sheet fed offset printer

Web Offset Printing-

Web offset is a form of offset printing in which a continuous roll of paper is fed through the printing press. Pages are separated and cut to size after they have been printed. Web offset printing is used for high-volume publications such as mass-market books, magazines, newspapers, catalogs and brochures. Web offset printing is more cost-effective for high-volume publications whose content changes often, such as metropolitan newspapers

There are two methods of web offset printing:

 Heat set – In the heat set process, the ink is dried rapidly by forced-air heating.

 Cold set (or non-heat set)-In the non-heat set or cold set process, the ink dries more slowly by ordinary evaporation and absorption.

Image result for web fed offset printing

Image result for web fed offset printing

Some web offset presses transfer text and images to only one side of the print medium at a time. Others can print on both sides simultaneously. The paper width is usually between 11 and 56 inches (approximately 28 and 142 centimeters). The paper is fed through the system at speeds ranging from 5 to 50 feet per second (approximately 1.5 to 15 meters per second).

source:https://www.britannica.com/technology/offset-printing https://en.wikipedia.org/wiki/Offset_printing